The redesigned home page and dashboard transform how you use generate.TAX, serving as a central command centre for your work. It provides at-a-glance insights into tax returns, team performance and key metrics — all within an organized, customizable workspace.
The dashboard includes two tailored views: My View and Manager View, each designed to surface the most relevant information based on your role. Information is displayed in an intuitive, card-based layout with interactive and customisable metrics and insights.
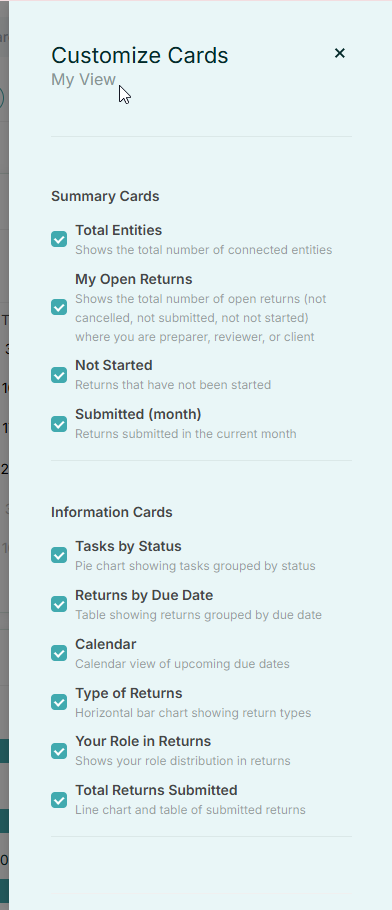
My View: Your Personal Workspace
My View is available to all users and provides a focused, personalised overview of your work. It helps you quickly see what needs attention, track progress and navigate to the returns that matter most.
When you open My View, you’ll see:
- Returns where you’re directly involved (preparer, reviewer or client)
- Key metrics such as total open returns, not-started returns and returns submitted this month
- Visual insights including:
- A status distribution pie chart
- A calendar with upcoming due dates
- A breakdown of your roles across returns
All dashboard elements are interactive. Clicking any metric or chart takes you directly to the Returns page with the relevant filters applied, making it easy to move from overview to action without manual setup.
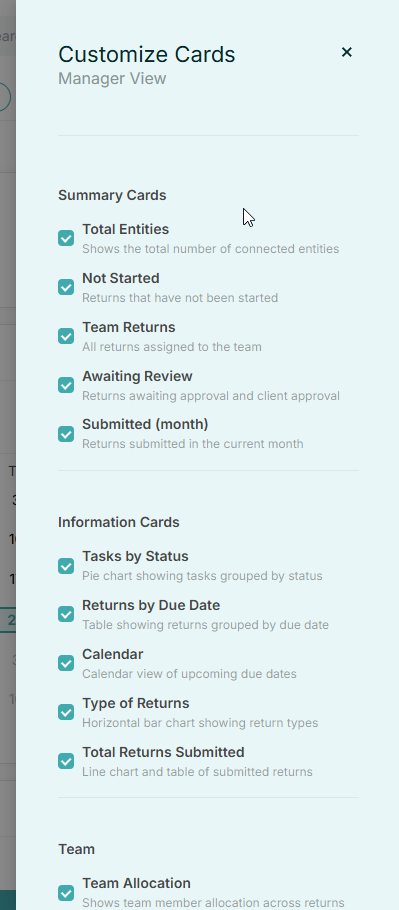
Manager View: Team-Wide Insights and Oversight
Manager View is available on Medium, Large and Enterprise subscription plans and is designed for team oversight and performance management. It provides organisation-wide visibility to help monitor workload, identify bottlenecks, track productivity and support informed resource decisions.
In Manager View, you’ll see:
- Team-wide metrics such as total returns, returns awaiting review and overall submission statistics
- A Team Allocation chart showing how work is distributed across team members
- A Time to Submit card highlighting the average time from return creation to submission per team member
All insights are presented in an interactive format, allowing you to drill down into specific details or filter data by team member or time period.
The Manager role is assigned by the account owner to those users who are responsible for a team of entities or who manage users working on VAT.
Fully Customisable Dashboard Experience
The dashboard is designed to adapt to your workflow, giving you full control over how information is displayed.
With Edit Mode, you can:
Rearrange cards to prioritize what matters most
Resize cards to highlight key metrics
Show or hide cards based on your needs
Restore hidden cards at any time
My View and Manager View each have independent layouts, allowing you to customize both experiences separately.
All of your preferences-card positions, sizes and visibility-are automatically saved and will persist across sessions and devices, so your dashboard always looks exactly the way you left it.
Related Articles
View login history
This guide shows step-by-step instructions on how to view login history. 1) There are 2 ways you can access this data, either by clicking on the name of the user you want to check details for. 2) Then click on the Login History tab. 3) A list of all ...
View attachments in transactions
This article covers the new ability to review and upload attachments directly within generate.TAX, eliminating the need to open Xero during the VAT return process. It highlights how this update streamlines review workflows, reduces system switching, ...
Returns page customizations
The Returns page has been redesigned to give you more flexible ways to view and manage your tax returns. You can switch between a traditional list, a visual board layout or a calendar view—depending on what works best for your workflow. With powerful ...
Assign user permissions
This guide offers step-by-step instructions for managing user permissions within an account. 1) Click the Users icon and click on the name you want to adjust permissions. 2) Click the Access Rights button to grant users access to entities, allowing ...
Add a Quickbooks organisation to your account
This is a guide that provides a step-by-step process for connecting a new organization, and re-connecting an organisation. Add a Quickbooks organisation 1) Click on the New Entity on any screen within generate.TAX. 2) Choose the Quickbooks button. 3) ...
