Introduction to Exceptions
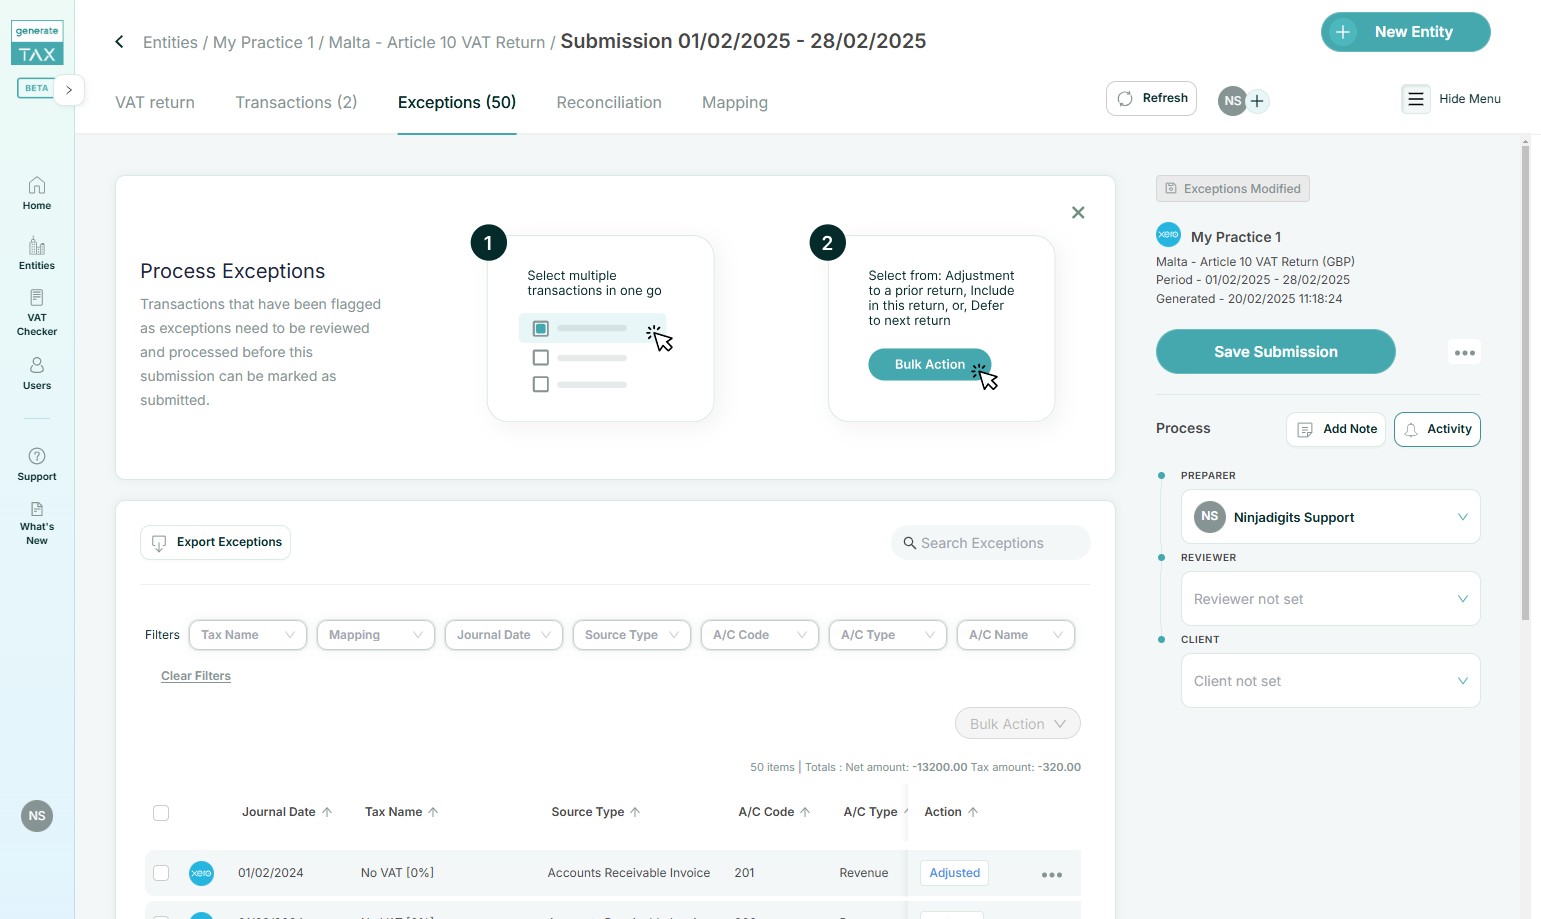
This guide provides a step-by-step process for accessing and managing out-of-period transactions captured as Exceptions. The transactions that have been flagged as exceptions need to be reviewed and processed before the submission can be marked as submitted.

There are three ways to handle exceptions: you can include them in the current submission, adjust and include them to a previous submission, or defer them to the next submission.
1) You can access the Exceptions tab once a submission is generated and saved.
2) There are 3 ways to handle the exceptions identified. The first option is to adjust transactions individually by selecting the 3 dots and choosing one of the options.
3) The second option is to select multiple transactions by ticking the boxes and handle these exceptions at one go for a faster and more efficient experience.
4) The third option is to select all transactions by clicking the tick box on the top.
Include transactions in the current submission
1) The first option is to include the transaction in the current submission. Once this is selected, you will see the Action column showing the transaction as Included.
2) Once you save the submission, you can go to the Transactions tab to see the adjustments.
3) You can see any adjusted transactions in the current submission marked at the top of the list, highlighted in a green colour to be easily identified.
Adjust in a prior submission
1) The second option is to adjust the transactions in a prior submission.
2) You will be prompted to choose from a previously submitted VAT return period from a list of submissions.
3) Choose a date for the adjustment submission.
4) Once the data is chosen, you can click Save.
5) You will see the chosen transaction/s as Adjusted in the exceptions transaction list.

After submitting the current return, you can go back to the previous submission and review the details of the exceptions included. The necessary adjustment can then be submitted to the authorities outside of generate.tax.
6) Once the adjustments are submitted, you can go to the previous submission where you adjusted the transactions.
7) Within the VAT Return, you can switch views between the Original submission and the Final version including the Adjustments.
8) You can also check the transactions where you can choose between Summarised and Detailed, with the adjusted transactions showing highlighted in green.
Defer to the next submission
1) You can also select multiple transactions to perform a bulk action.
2) You have a Bulk Action menu and you can choose to defer the transactions to the next submission.
3) Once transactions are defered to next submission, you will see Defered in the Action tab.
User action logs
1) The Activity button allows you to view the history of all actions taken in any submission, including any exceptions adjustments.
2) You will see the full history, including the timeframe of each action taken.
3) If you chose to adjust in a prior submission, the log within activities has a clickable submission period.
4) Once you click on this submission link, you will be redirected to that submission and you can check the adjustments made.
5) You can still modify adjusted transactions after saving the submission, as long as the changes are made before submitting the report.

Success! You have handled the captured exceptions.
Related Articles
Calculate Reverse Charges
This is a step-by-step guide showing how to calculate reverse charges. 1) We are handling the reverse charge which caters for situations where this is taken care of within the accounting software or if this will need to be handled by generate.TAX. ...Create a new TAX submission
This guide provides step-by-step instructions on how to generate and view VAT returns using the generate.TAX portal. It explains how to create new returns, edit returns that haven't been submitted, and view previously submitted returns. The guide ...Exporting data in generate.TAX
Learn how to export your VAT Return, transaction details, and notes activity in generate.TAX. This guide walks you through exporting as Excel, and PDF files, helping you efficiently retrieve the data you need. Export VAT Return - Excel and PDF 1) ...